
Introduction
Spider Man, the beloved superhero of many, has inspired a wide range of merchandise and fan art. One popular trend that has emerged is Spider Man nail art. This unique and creative form of self-expression allows fans to showcase their love for the web-slinging hero on their fingertips. In this article, we will explore various Spider Man nail designs, offer step-by-step instructions on how to create them, and provide some tips and tricks to make your Spider Man nails stand out.
Spider Man Nail Design Ideas
When it comes to Spider Man nail designs, the possibilities are endless. Whether you prefer a minimalistic approach or a more intricate design, there is something for everyone. Here are a few ideas to get you started:

Classic Spider Web Design
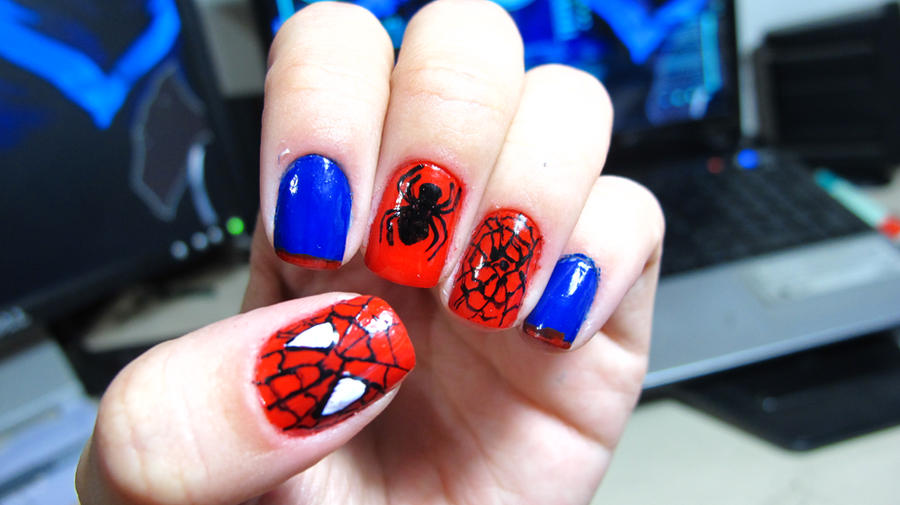
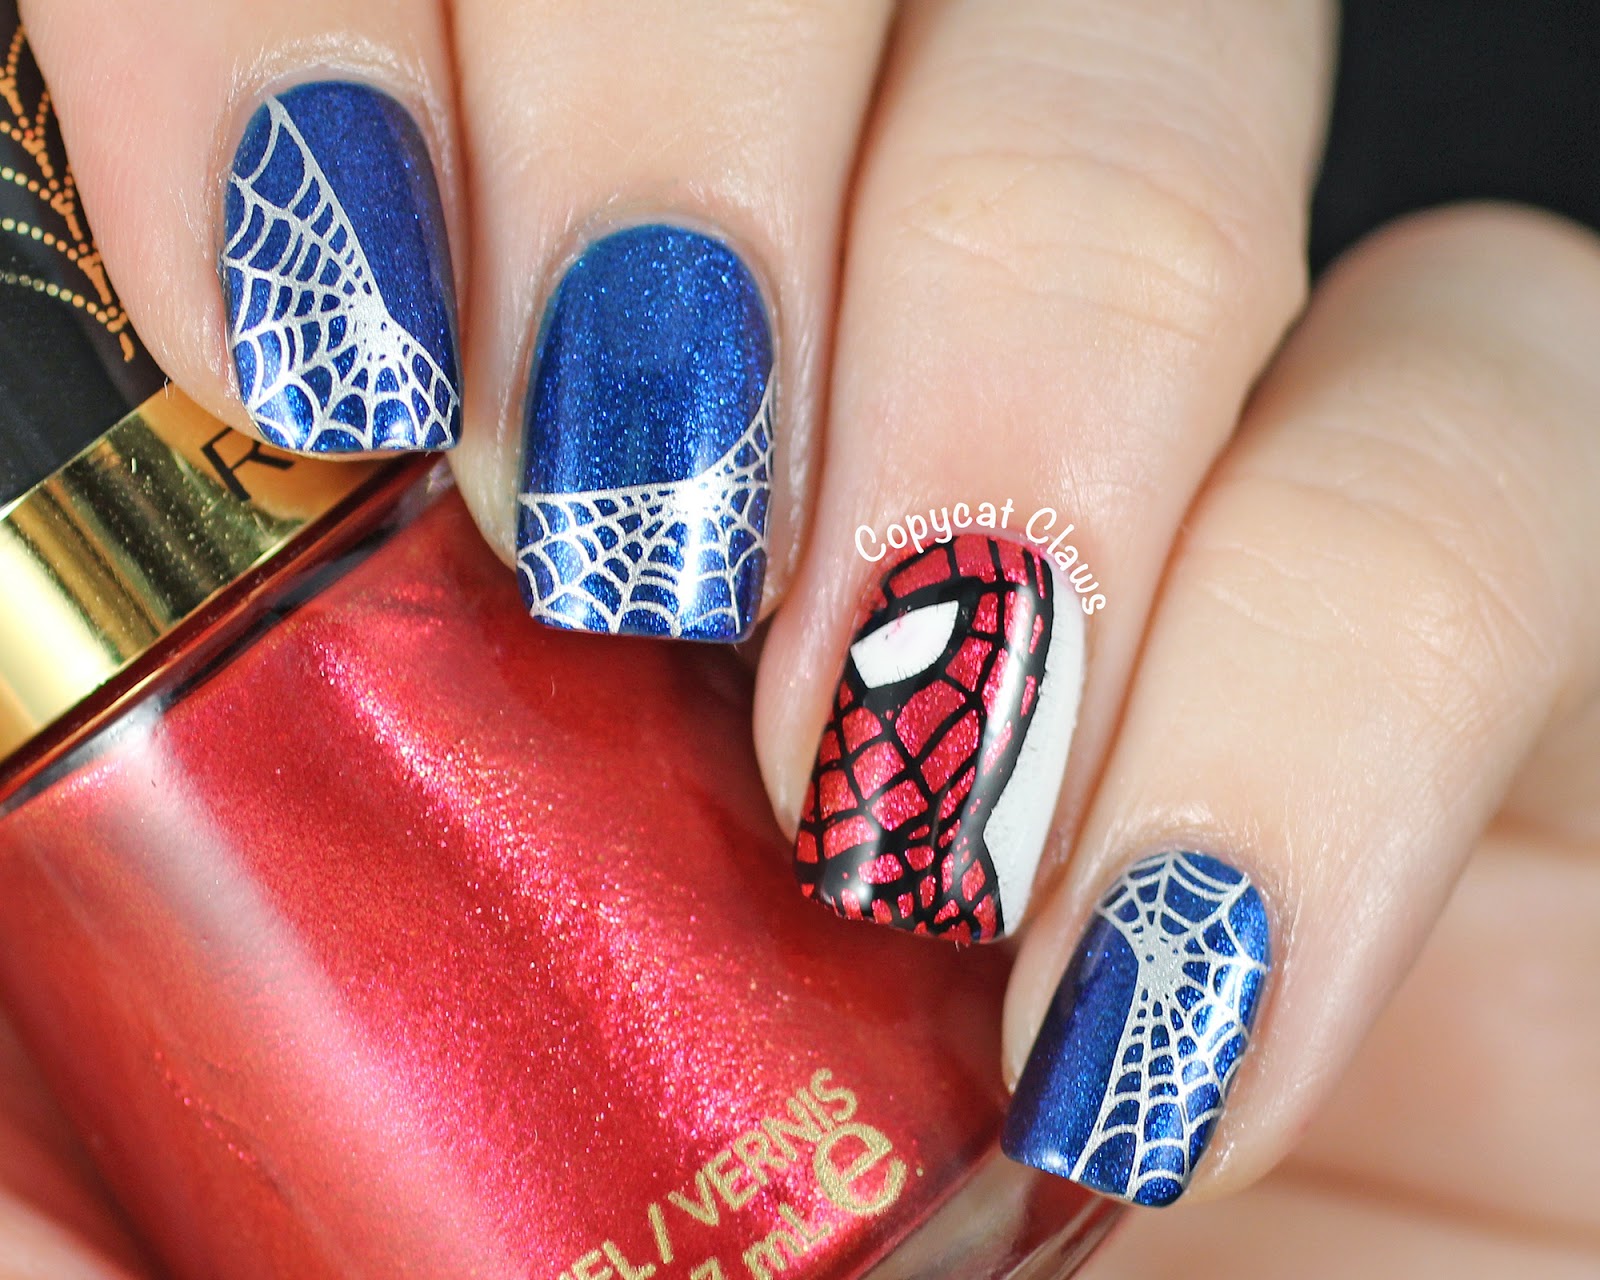
The classic Spider Man nail design features the iconic red and blue color scheme with a subtle spider web pattern. To create this design, start by applying a red base coat to your nails. Once dry, use a thin brush to draw intersecting lines in blue. Connect these lines to create a spider web pattern. Finish off with a clear top coat to seal the design.

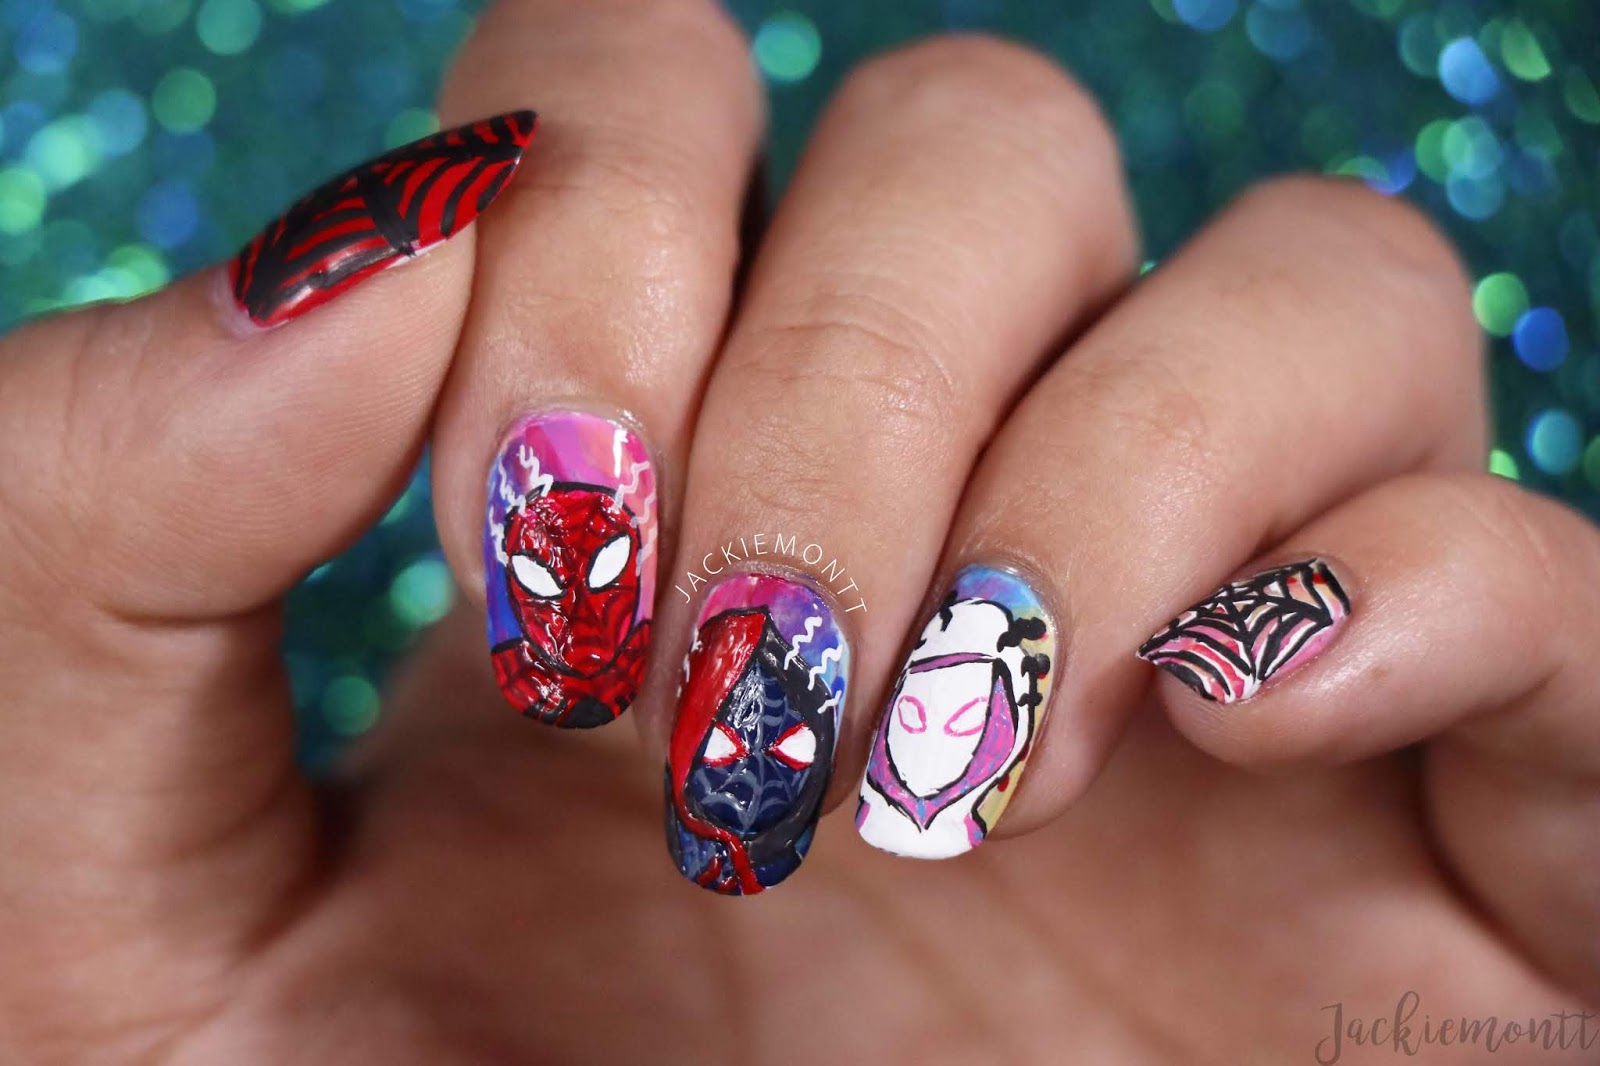
Spider Man Mask Accent Nail
If you prefer a more subtle design, consider adding a Spider Man mask accent nail. Start by painting your nails with a red base coat. Once dry, use a black nail art pen or a thin brush to draw Spider Man's mask on one nail. You can also add small white dots for the eyes. Finish off with a clear top coat to protect the design.
Spider and Web French Tips
Add a twist to the classic French tip design by incorporating Spider Man elements. Start by applying a red base coat to your nails. Once dry, use a thin brush to create a white French tip. On the accent nail, draw a small black spider near the cuticle area. Connect the spider to the French tip with a thin black line to create a web-like effect.
Step-by-Step Guide to Creating Spider Man Nails
Now that you have some design ideas, let's dive into a step-by-step guide on how to create Spider Man nails:

Materials You Will Need
Before you begin, gather the following materials:
- Red nail polish
- Blue nail polish
- Black nail polish
- White nail polish
- Thin nail art brush
- Nail art pen (optional)
- Clear top coat
Step 1: Prepare Your Nails
Start by removing any existing nail polish and shaping your nails to your desired length and shape. Apply a base coat to protect your natural nails and allow it to dry completely.
Step 2: Apply Base Color
Apply a coat of red nail polish to all your nails. Let it dry completely before moving on to the next step.
Step 3: Create Spider Web Pattern
Using a thin brush or a nail art pen, create a spider web pattern on one or more nails using blue nail polish. Start by drawing intersecting lines and connect them to form the web. Allow the design to dry completely.
Step 4: Add Spider Man Mask
If you want to incorporate a mask accent nail, use a black nail art pen or a thin brush to draw Spider Man's mask on one nail. Add small white dots for the eyes. Allow the design to dry completely.
Step 5: Create French Tips
If you prefer the Spider and Web French Tips design, create a white French tip on each nail using a thin brush. On the accent nail, draw a small black spider near the cuticle area and connect it to the French tip with a thin black line. Allow the design to dry completely.
Step 6: Apply Top Coat
Finish off your Spider Man nail art by applying a clear top coat to seal and protect the designs. Allow the top coat to dry completely.
Tips and Tricks for Stunning Spider Man Nails
Here are some tips and tricks to help you achieve stunning Spider Man nails:
- Practice your design on a nail wheel or fake nails before attempting it on your own nails.
- Use nail stencils or decals to create precise designs if you're not confident in your freehand skills.
- Apply thin, even coats of nail polish to prevent clumping and streaking.
- Use a quick-drying top coat to speed up the drying process.
- Experiment with different color combinations to put your own spin on the Spider Man nail art.
Conclusion
Spider Man nails are a fun and creative way to display your love for the friendly neighborhood superhero. Whether you opt for a classic spider web design, a mask accent nail, or Spider and Web French tips, there are endless possibilities to explore. By following the step-by-step guide and incorporating the tips and tricks mentioned, you can create stunning Spider Man nails that will surely catch everyone's attention. So, unleash your inner superhero and get ready to rock your Spider Man-inspired nail art!
